Java Spring boot配置管理总结
Java profile不同环境使用不同配置
通过配置application.yml
application.yml是默认使用的配置文件,在其中通过spring.profiles.active设置使用哪一个配置文件,下面代码表示使用application-prod.yml配置,如果application-prod.yml和application.yml配置了相同的配置,比如都配置了运行端口,那application-prod.yml的优先级更高
#需要使用的配置文件
spring:
  profiles:
    active: prod
VM options、Program arguments、Active Profile
VM options设置启动参数 -Dspring.profiles.active=prod
Program arguments设置 –spring.profiles.active=prod
Active Profile 设置 prod
命令行方式
将项目打成jar包,在jar包的目录下打开命令行,使用如下命令启动:java -jar spring-boot-profile.jar --spring.profiles.active=prod
Java SpEL
使用SpEL表达式绑定字符串集合
employee.properties
1 | employee.names=james,curry,zimug,姚明 |
Employee
1 | @Data |
1 | @ExtendWith(SpringExtension.class) |
SpEL结合@Value注解读取配置文件属性
假如我们需要获取第一位(数组下标从0开始)雇员的姓名,可以使用如下的SpEL表达式:
1
2@Value ("#{'${employee.names}'.split(',')[0]}")
private String firstEmployeeName;属性值注入完成之后,firstEmployeeName=‘’james‘’
我们还可以使用@Value注解将键值对、类对象的数据结构转换为java的Map数据类型
1
2@Value ("#{${employee.age}}")
private Map<String, Integer> employeeAge;属性值注入完成之后,employeeAge={one=27, two=35, three=34, four=26}
- 假如我们需要根据Map的Key获取Value属性值,可以使用如下的SpEL表达式:属性值注入完成之后,employeeAgeTwo=35
1
2
3@Value ("#{${employee.age}.two}")
// @Value ("#{${employee.age}['two']}") //这样写也可以
private String employeeAgeTwo;
- b如果我们不确定,Map中的某个key是否存在,可以使用如下的SpEL表达式。如果key存在就获取对应的value,如果不存在就获得默认值31属性值注入完成之后,ageWithDefaultValue=31
1
2
@Value ("#{${employee.age}['five'] ?: 31}")
private Integer ageWithDefaultValue;
SpEL结合 @Value注解读取系统环境变量
还可以使用SpEL表达式读取系统环境变量,示例如下,获取JAVA_HOME目录:
1
2
@Value ("#{systemProperties['java.home']}")
private String javaHome;同理,可以获取系统用户工作目录
1
2@Value ("#{systemProperties['user.dir']}")
private String userDir;
Java YAML
配置Demo
1 | family: |
YAML配置绑定变量两种方式
通过@Value注解将family.family-name属性的值绑定到familyName成员变量上面。
1
2
3
4
5
6@Data
@Component
public class Family {
@Value("${family.family-name}")
private String familyName;
}使用@ConfigurationProperties获取配置值
1 | // 1. 一个家庭有爸爸、妈妈、孩子。 |
对配置数值进行校验
在需要校验的属性装配类上加@Validated注解
校验父亲的年龄,必须大于21岁
1
2
3
4
5public class Father {
private String name;
@Min(21)
private Integer age;
}
校验familyName,必须不能为空
1
2@NotEmpty
private String familyName;针对Family的属性校验,只需要写一个测试类,将Family类注入就可以。
1 | @ExtendWith(SpringExtension.class) //Junit5 |
- 其他参考例子:
- @size (min=6, max=20, message=”密码长度只能在6-20之间”)
- @pattern (regexp=”[a-za-z0-9._%+-]+@[a-za-z0-9.-]+.[a-za-z]{2,4}”, message=”请输入正确的邮件格式”)
- @Length(min = 5, max = 20, message = “用户名长度必须位于5到20之间”)
- @Email(message = “请输入正确的邮箱”)
- @NotNull(message = “用户名称不能为空”)
- @Max(value = 100, message = “年龄不能大于100岁”)
- @Min(value= 18 ,message= “必须年满18岁!” )
- @AssertTrue(message = “bln4 must is true”)
- @AssertFalse(message = “blnf must is falase”)
- @DecimalMax(value=”100”,message=”decim最大值是100”)
- @DecimalMin(value=”100”,message=”decim最小值是100”)
- @NotNull(message = “身份证不能为空”)
- @Pattern(regexp=”^(\d{18,18}|\d{15,15}|(\d{17,17}[x|X]))$”, message=”身份证格式错误”)
加载额外配置文件(老旧项目文件)
-
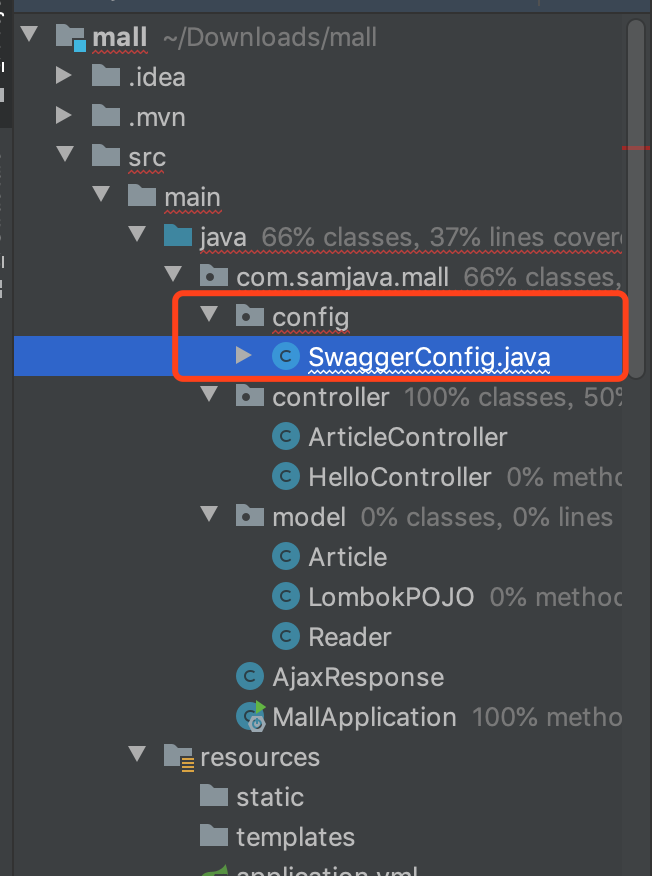
Java swagger
pom.xml
1 | <dependency> |
```bash
@Configuration
@EnableSwagger2
public class Swagger2 {
private ApiInfo apiInfo() {
    return new ApiInfoBuilder()
            .title("springboot利用swagger构建api文档")
            .description("简单优雅的restfun风格")
            .termsOfServiceUrl("http://www.zimug.com")
            .version("1.0")
            .build();
}

@Bean
public Docket createRestApi() {
    return new Docket(DocumentationType.SWAGGER_2)
                    .apiInfo(apiInfo())
                    .select()
                    //扫描basePackage包下面的“/rest/”路径下的内容作为接口文档构建的目标
                    .apis(RequestHandlerSelectors.basePackage("com.zimug.bootlaunch"))
                    .paths(PathSelectors.regex("/rest/.*"))
                    .build();
}}1
Java Mockito
1 | @Slf4j |
Java 单元测试
针对接口编写单元测试
1 | package com.samjava.mall; |
MockMvc对象有以下几个基本的方法:
perform : 模拟执行一个RequestBuilder构建的HTTP请求,会执行SpringMVC的流程并映射到相应的控制器Controller执行。contentType:发送请求内容的序列化的格式,”application/json”表示JSON数据格式andExpect: 添加RequsetMatcher验证规则,验证控制器执行完成后结果是否正确,或者说是结果是否与我们期望(Expect)的一致。andDo: 添加ResultHandler结果处理器,比如调试时打印结果到控制台andReturn: 最后返回相应的MvcResult,然后进行自定义验证/进行下一步的异步处理
上面的整个过程,我们都没有使用到Spring Context依赖注入、也没有启动tomcat web容器。整个测试的过程十分的轻量级,速度很快。
Java jackson-JSON数据格式处理
1 | @Data |
Java Restful接口
2.1、RESTful是面向资源的(名词)
动词不会出现在URL里面。
2.2、用HTTP方法体现对资源的操作(动词)
GET : 获取、读取资源
POST : 添加资源
PUT : 修改资源
DELETE : 删除资源
2.3. HTTP状态码
通过HTTP状态码体现动作的结果,不要自定义
1 | 200 OK |
.4. Get方法和查询参数不应该改变数据
改变数据的事交给POST、PUT、DELETE
2.5. 使用复数名词
/dogs 而不是 /dog
2.6. 复杂资源关系的表达
GET /cars/711/drivers/ 返回 使用过编号711汽车的所有司机
GET /cars/711/drivers/4 返回 使用过编号711汽车的4号司机
2.7. 高级用法:HATEOAS
HATEOAS:Hypermedia as the Engine of Application State 超媒体作为应用状态的引擎。
RESTful API最好做到HATEOAS,即返回结果中提供链接,连向其他API方法,使得用户不查文档,也知道下一步应该做什么。比如,当用户向api.example.com的根目录发出请求,会得到这样一个文档。
1 | {"link": { |
上面代码表示,文档中有一个link属性,用户读取这个属性就知道下一步该调用什么API或者可以调用什么API了。
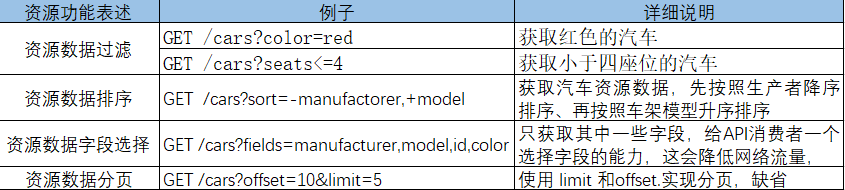
2.8. 资源过滤、排序、选择和分页的表述
2.9. 版本化你的API
强制性增加API版本声明,不要发布无版本的API。如:/api/v1/blog
面向扩展开放,面向修改关闭:也就是说一个版本的接口开发完成测试上线之后,我们一般不会对接口进行修改,如果有新的需求就开发新的接口进行功能扩展。这样做的目的是:当你的新接口上线后,不会影响使用老接口的用户。如果新接口目的是替换老接口,也不要在v1版本原接口上修改,而是开发v2版本接口,并声明v1接口废弃!